Thursday, December 24, 2015

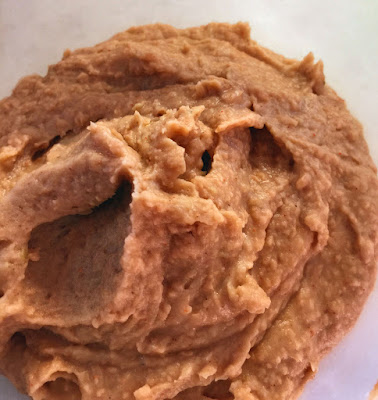
Bean Dip

Time for a little Christmas Magic! My brother and I used to love that bean dip that came in the little cans. We pigged out on it all the time with Doritos. I wanted to make some for Christmas this year and began looking around for the recipe. Turns out, I didn't have to look farther than my favorite cookbook author, Todd Wilbur! His version is spot on and takes me straight back to my childhood. Also, it is sooooo easy!  I doubled the recipe for a crowd and I did teak the number of jalapeno slices...cause mine were tiny!

Easy Bean Dip 
Look at those spices! Yummmmmm!


Ingredients

1 (15 ounce) cans pinto beans, drained
4 canned jalapeno slices, plus 1 tablespoon jalapeno juice  (I doubled the recipe and used about 1/4 cup of the slices)
1/2 teaspoon salt  
1/2 teaspoon sugar  
1/4 teaspoon onion powder  
1/4 teaspoon paprika  
1/8 teaspoon garlic powder  
1/8 teaspoon cayenne pepper

Directions

  1. Combine all ingredients in a food processor.
  2. Puree on high speed until smooth.
  3. Cover and chill for at least 1 hour before serving.
That's it! Now you have the tastiest bean dip around. I have also tried this with great northern beans...omg it is absolutely amazing! So if you want a white bean dip, you can use those. I believe you could use any type of bean and it would turn out great. Chick Peas with this make a great hummus!
If you like this, head over to Todd's site and find a whole slew of wonderful copycat recipes to try! He also sells his books and some great spice mixes and such. 

Friday, December 4, 2015

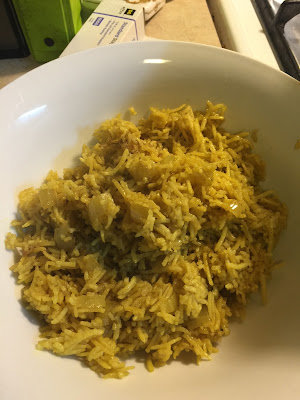
Curried Rice

I have fallen in love, a deep true love that I know will last a lifetime....with Basmati rice. I have had it in Indian restaurants and adored it, but when I tried at home, fizzzzzle.  Well, let me tell you that has changed. The key to success with Basmati is all in the cooking process.  I had a rice cooker, yes, shameful. I thought it was the bee's knees. No, it has kept me chained to bland, non-fluffy rice!  I am going to show you how to make delicious, fluffy, Basmati rice and this technique works on jasmine and regular too. This is how you get the great, separate grains!  Oh and I will give you the best curried rice recipe ever while I'm at it!

Curried Rice
Look at this delicious stuff.


Whatever recipe you have that calls for rice, here is how you need to prep your rice:

1. Cover rice with water and wash it. Yes. Wash it! Swish it around good with your hand and then drain the water off, refill it and do it again...total of 4 or 5 times. You can just drain most out, no need to go get the colander.
2. When your water is looking mostly clear after washing, fill it to cover well and let it soak for at least 30 minutes.
3. Finally, drain it well and use as usual for your recipe.

Now for the curried rice. I dream about this rice. In fact, I am cooking some this very moment. It is that good.

Ingredients

        1 medium onion, finely chopped
        3 garlic cloves, finely chopped
        3 tablespoons olive oil
        4 teaspoons curry powder
        2 cups long-grain white rice
        3 1/4 cups water
        2 teaspoons salt

1.  Cook onion and garlic in oil in a 3- to 4-quart heavy saucepan over moderately low heat, stirring, until softened. Add curry powder and rice and cook, stirring, 1 minute.
2. Add water and salt and bring to a boil, then boil, uncovered, without stirring, until surface of rice is covered with steam holes and grains on top appear dry, about 8 minutes.
3. Reduce heat to as low as possible, then cover pan with a tight-fitting lid and cook 15 minutes more.
4. Remove pan from heat and let rice stand, covered, 5 minutes, then fluff with a fork.

That is it. You will roll around on the floor from the goodness.


Sunday, November 15, 2015

Best Salsa, period.

My Salsa is now up for sale! I have had so many people tell me to start doing it, I finally have. Head on over to the shop section for all the yummy details!

Always Made Fresh

Lava Lava Shrimp (Margaritaville)

My favorite thing to get from Margaritaville is their Lava Lava shrimp, which is a copy cat of Bonefish Grill's bang bang shrimp. Today, I am giving you a copy cat of that!
This recipe comes from the master of copy cat recipes, Todd Wilbur. If you want to make dishes from your favorite restaurants and want them to taste exactly the same, but for a fraction of the cost, I recommend you get his books. I have all of them and have never had a dish turn out less than perfect. I first started trying them more than 20 years ago. He is just about my favorite cookbook author. Here is the link to his site, go buy the Top Secret Restaurant Recipes books!  Top Secret Recipes

Lava Lava Shrimp
Yummy!

This tastes just like the dish from both restaurants, but at a fraction of the price. It is unbelievably expensive on the menus. I made enough for 4 people for the price of one appetizer! You must make the sauce to get the full experience. People who don't like mayo will balk, but I have had several who refuse to eat mayo just lap this up. The secret is the chili sauce and you can find this at Walmart or any grocery store in their Asian aisle, the rice vinegar too, tho you can substitute white vinegar if you don't have any.

Ingredients:
Spicy Sauce:
  ½ cup mayonnaise
  4 teaspoons chili garlic sauce (sambal sauce)
  1 teaspoon granulated sugar
  ½ teaspoon rice vinegar
Breading:
  1 egg, beaten
  1 cup milk
  3/4 cup all-purpose flour
  ½ cup panko breadcrumbs
  1 teaspoon salt
  ½ teaspoon ground black pepper
  ½ teaspoon rubbed (ground) sage
  ¼ teaspoon onion powder
  ¼ teaspoon garlic powder
  ¼ teaspoon dried basil
  8 to 12 cups vegetable shortening or oil
  16 to 18 medium shrimp, peeled and deveined ( I use a whole bag of small or medium)
Garnish:
  1 handful of mixed greens
  1 green onion, chopped (green part only)
Directions:
- Combine all ingredients for chili sauce in a small bowl. Cover the sauce and set it aside for now.
- Combine the beaten egg with milk in a shallow bowl. Mix flour, panko, salt, black pepper, sage, onion powder, garlic powder, and basil in another shallow bowl.
- Heat shortening or oil to 350 degrees F. Use the amount of oil required by your fryer.
- Bread the shrimp by first coating each with the breading. Dip breaded shrimp into the egg and milk mixture, and then back into the breading. Arrange the coated shrimp on a plate and pop them into the fridge for at least 20 minutes. This step will help the breading to stick on the shrimp when they are frying.
- When your oil is hot, fry the shrimp for 3 to 4 minutes or until golden brown. Drain on a rack or paper towels. When all of the shrimp have been fried, drop the shrimp into a large bowl. Spoon about ¼ cup of the sauce over the shrimp and stir gently to coat. Stack the shrimp on a bed of mixed greens, then sprinkle the stack with chopped green onion.( I place the shrimp on the greens and drizzle some sauce on it, like Margaritaville)
*Serves 2 to 4 as an appetizer.

Now.... Let me make a recommendation on a deep fryer. If you are trying to eat healthier, deep frying is usually out of the question. This dish will not be half as good baked, so I had to find a better fryer. I did some review reading and decided to try the new and improved Fry Daddy. It only uses 4 cups of oil, compared to almost 2 bottles of the other fryers. It is small, self-contained and has a lid for storage when not in use. The best thing about it is that it cooks the food super hot, it has no dials and no way for you to overheat or underheat the oil. By cooking it super hot, the food absorbs less oil and is more crunchy with less grease!  Take a look: Fry Daddy

*Note: I haven't been paid to endorse either Todd Wilbur or Fry Daddy, just passing on my own cooking experiences! 

Monday, August 10, 2015

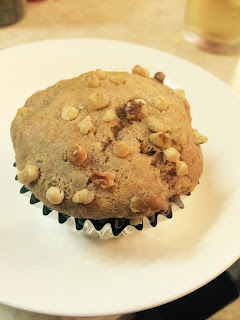
Banana - Carrot Cake Muffins

Banana Muffin

Quick, easy and much healthier than a regular cupcake or muffin! These delicious things are unbelievably easy, you will be amazed. The great thing is, they are perfect for a quick breakfast, snack or a dessert you don't have to feel too guilty over!

Easy Banana Carrot Cake Muffins

1 carrot cake cake mix
3 or 4 mashed bananas
Whatever toppings you want

1. Mash the bananas thoroughly in a large bowl.

2. Add the cake mix and stir well.

3. Line a 12 cup muffin tin with paper liners of your choice.

4. Fill the liners up! You can really top these off and if you use all the batter, it is going to look too full but they do not rise as high as a regular cake mix so you will be fine.

5. Sprinkle your favorite toppings on. I used mini white chocolate chips and walnuts.

6. Bake according to the time for cupcakes on the box.

That is seriously all there is to these wonderful muffins and they taste bakery good!

Friday, August 7, 2015

The Best Fried Chicken You Will Ever Eat


Chicken Tenders

Yes, I know that is a bold statement! But really, this chicken tops everything, including any restaurant. I adapted this from a Paula Deen recipe I found ages ago and it is simply amazing. Crispy on the outside, tender and moist on the inside. Perfection. Just look at that picture. Ok, now the really amazing part is... that is two chicken breasts....two. That made a whole plate of chicken, twelve tenders that could easily feed a family of four because they are HUGE! So this recipe is not only delicious, it is also thrifty!

Onward to the recipe and I will be stepping in to give you tips at certain parts.


3 eggs
1/3 cup water
About 1 cup hot red pepper sauce (I used Franks)
2 cups self-rising flour
1 teaspoon pepper

Paula's House Seasoning.
1 Teaspoon of salt.
1/2 Teaspoon of pepper
1/2 Teaspoon of garlic powder

 I used chicken breasts for this recipe, you do not have to, you can certainly just use a whole cut-up chicken, chicken thighs...whatever you want!

1. If you are using breasts, put them in a zip-lock bag and take a meat hammer to them to thin them to about half an inch. You want to do this, trust me. It is how you get super tender chicken. In fact, do this anytime you are going to cook chicken breasts, you will thank me.  Ok, where was I? Oh yes! Cut the breasts into tender sized strips. You could also make nuggets, you would just need to cut the cooking time down to 3 minutes instead of 5.

2. In a medium size bowl, beat the eggs with the water. Add enough hot sauce so the egg mixture is bright orange. I added, probably a good 3/4 cup.

3. In another bowl, combine the flour and pepper.
4. Season the chicken with the house seasoning. I put it all in a big bowl and just dumped it in and wrasseled the chicken around a little.

5. Dip the seasoned chicken in the egg, and then coat well in the flour mixture. AND then, do it again. Yes, double dip that chicken. This is how you are going to get those crunchy crevices.

Now, the next part is the cooking part... and this is not going to be near as good if you don't deep fry it. Shhhh, I can hear you screaming! But really, the deep frying is key to the crunchy, tender goodness. You can use a pot of oil, a deep fryer..whatever you have but let me make a suggestion.

I have tried every deep fry method out there: pots of oil, double fryers, kettle fryers and nothing comes close to being as good as the latest model of the Fry Daddy. There are no settings or dials, you just plug that sucker up and it works. And, it gets the oil professionally hot. A great thing about this little fryer and its super hotness is that is is not going to soak up as much oil as the other methods. Trust me, these tenders came out with very little greasiness. They have them $20 at the Walmart, and I highly recommend you invest in one if you want to do any frying and want very good results. I wanted to make Lava Lava Shrimp (yes I will get that recipe on here too) and my old fryer looked, well yucky. I didn't want to use a pot of oil and just bought this one cause it was cheap. I am now a Fry Daddy believer. Onward!

6. Heat your oil up to a good 400 if you can get it that hot, you want this to be some hot oil. If you are using the Fry Daddy, drop 2 to 3 in at a time and cook for 5 minutes. Nuggets will take less time and whole pieces of chicken will take more. Anything other than tenders, just do one and test it.

7. Drain on paper towels then enjoy.


Saturday, May 23, 2015

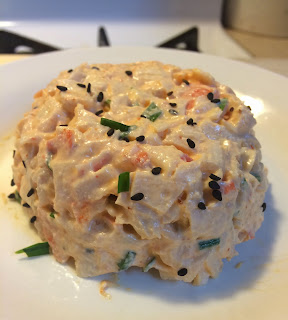
Spicy Asian Crab Salad

We love sushi, adore it and would eat it every meal. We also love the spicy crab salad that is served as an appetizer at one of our favorite sushi places. I have been working on trying to duplicate it, and today, I believe I have succeeded. The only difference is, this one lacks chopped avocado. I have to admit that it would have took it over the moon, but my laziness prevented me from going back out for an avocado!  This would also work great for spicy crab rolls.

Crab Salad
Doesn't that just look fancy? You won't believe how easy it is....get ready to impress your friends.


Spicy Asian Crab Salad

  • 1 pack of imitation crab (about 8 ounces)..the more it costs, the better it will taste. Louis Kemp is my favorite.
  • 3 tablespoons of low fat cream cheese, softened
  • 1 tbsp Mayonnaise
  • 1 tablespoon sriracha hot sauce (adjust to your liking)
  • 1/2 tsp chopped or dried chives
  • pinch of cayenne (to your taste)
  •  Black or regular sesame seeds for garnish. 
Add in one chopped avocado to make this truly astounding.
Chop the crab very fine and mix with all the ingredients.
Line two ramekin bowls (or any small bowl) with plastic wrap and pack the mixture in tight.
Fridge it for a couple hours, then you just pop it out, upside-down on a plate and sprinkle with sesame seeds.


Sunday, May 17, 2015

Crème Fraîche

Do you like sour cream?  Yes? Then let me introduce you to sour cream's older and prettier sister, Crème Fraîche. Don't get me wrong, I adore sour cream, but crème fraîche is richer, silkier and just delectable. Also, it is very expensive....that is when you can find it. I live in Sparta, TN and no one here would even know what it is, let alone carry it in their stores. Have I ever mentioned that my husband is French? Well he is, and crème fraîche is a must in our home, like many other French delicacies. Being that it is impossible to find, I had to come up with a way to make it and I succeeded!
First, take a look at the glorious stuff:


Creme Fraiche


Makes me swoon! This is dead simple to make. When I show you how, you will be angry if you ever see it for $8 a pot. Ready? Here is how it works.

Crème Fraîche

-16 oz container of Whipping Cream, doesn't matter if its pasteurized or unpasteurized..people will tell you it does, but they are liars.

-4 tablespoons of buttermilk. Make sure it is whole and not the low-fat kind, this does matter in that the low-fat kind will make a runnier crème fraîche.

Directions: 
1. Pour the whipping cream into a little container that you can cover in the fridge. 
2. Pour in your 4 tablespoons of buttermilk. 
3. Stir well. 
Directions: 
Cover with some cheese cloth or loosely with a paper towel. I use cheese cloth and a rubber band...fancy I know! 

 Let it sit for 24 to 48 hours somewhere on your counter. Now listen, really let it sit out. It won't mold or go bad, well actually what you WANT it to do is go bad, so this works. When it is as thick as sour cream or a bit thicker, cover it and put it in the fridge. It will stay good for 2 weeks or more. 

Put it on anything you would use sour cream for or be like me and eat it by the spoon. It is divine. Also, laugh at any store that wants an arm and a leg for it, because yours tastes better! 


Tuesday, April 28, 2015

Bird's are chirping, the sun is shining and I am having Carnation Instant Breakfast! Yes, people mistake me for James Bond because of my exciting life. Here is a great tip if you do like to partake of the powdered drinks: Use a Magic Bullet.  Now, it doesn't have to be that brand. I think mine is actually NuWave or something, but I will always call it Magic Bullet because that is much more fun to say. Anyway, your powdered drinks, that are usually gritty and taste like mud shakes, will turn out smooth, creamy and actually drinkable! You really won't believe the difference. It is definitely worth dirtying up the Bullet to have such a creamy, delicious breakfast/snack.