Monday, February 8, 2016

Samosas!

Remember that Mint Chutney I showed you a while ago? Today I am giving you something to dip in it. Samosas are Indian pastries with savory fillings. They can be baked or fried and are simply delicious!

There are so many different recipes for these lovely little things that it can be hard to decide on which to make. Do you want to make the pastry or use something premade? Which spices? Meat or no meat? So many tasty choices with these.

I decided to go with vegetable only and wonton wrappers, just for ease of preparation. They turned out perfect. Crisp on the outside and creamy delicious on the inside.


I made these as an appetizer for a few other dishes, but honestly, they would have been a delightful meal on their own. Perfect with Mint Chutney or Raita Sauce, which I will put on here soonish.

These were actually fun to make. I did use the Fry Daddy, but you could easily brush these with oil or spray and bake them.

Veggie Samosas

1  cup mashed potatoes (boxed or real)
1/4 cup cooked lentils
1 tablespoon minced fresh mint
2 teaspoon curry powder (add more or less to taste)
1 teaspoon butter, softened
1/4 teaspoon salt
1/4 teaspoon ground cumin
1/2 cup frozen green peas, thawed
10 or so wonton wrappers

Begin by preheating your deep fryer/oil or oven to 425°.
1. First, you need to combine the potatoes, lentils, mint, curry powder, butter, salt and cumin.
2. Now, gently fold in the peas.
3. Take each wonton wrapper and, working one at a time, moisten the edges with water and spoon about 1 tablespoon of the mixture onto the wonton wrapper. Fold it onto a triangle and press the edges together to seal.
4. Deep fry in small batches until they are brown and crisp, around 5 minutes or more, depending on your method of frying. If you are baking them, Spray with cooking spray or brush with oil and bake at 450° for about 15 minutes until they are also brown and crispy.

Now you can dip them in your favorite sauce (hint: Mint Chutney) and enjoy. The only problem is trying not to eat the whole batch!


Friday, January 29, 2016

Gator Bites

Some time ago, my cousin gave me 2 pounds of alligator tail steaks. These were beautiful, thick steaks with a great color. Of course I decided to make 'gator bites out of them! This would be an amazing recipe to have for Mardi Gras, which is coming up in a couple of weeks.

Just to make it clear, these are from real alligators, not some fake fish thing..like most of the 'crab' you see in food now-a-days.

Tasty Tasty


I had never attempted gator bites, never found the meat actually or I would have! We had them quite often at Crawdaddy's down in Cookeville and they are delicious! They do tend to be a bit chewy and I have the fix for that! My next step was to find a recipe that was good enough to match the restaurant ones and also easy to fix. I had to look no further than Paula Deen, one of my favorite cooks. Her recipe is perfection.

This recipe needs to be deep fried to get the perfect taste and texture. You could bake them, but I am not sure how they would turn out..dryer probably and you don't really want that. I again used my awesome little Fry Daddy, which is the best deep fryer I have ever tried. Gets very hot and the food is about half as greasy as with any other I have used. I recommend one if you just need the occasional deep frying.

Don't be intimidated by Mr. Gator, it is not hard to fix at all. I have discovered that you really need to look over the meat and cut out any cartilage or gristly stuff that you find. It is not gross looking but you can feel it is tougher than the meat. That is what I think lends the toughness to the restaurant gator bites. It probably took me 10 minutes total to get all of it out of 2 pounds and it was well worth doing!

Gator Bites


Here is the recipe directly from Ms. Deen.

Fried Gator Bites
I found this worked well for the 2 pounds I had.

  • 1 pound alligator meat, cut into chunks (can substitute chicken or pork)
  • Salt and freshly ground black pepper
  • Flour, for dredging (about 2 cups)
  • 1 cup buttermilk
  • 1 cup hot sauce
  • 1 bottle store bought ranch dressing, for dipping
Heat a deep-fryer to 350 degrees F. (or use the Fry Daddy and don't worry about temperature)

Lightly season gator meat with salt and pepper prior to dredging them in flour. Combine buttermilk and hot sauce into 1 mixture. Dip the gator meat into the buttermilk and hot sauce mixture and dip, once again, in flour. Then place in deep fryer until golden brown, just a couple minutes. Drain on paper towels and serve with ranch dressing or remoulade.
And....

Here is a fantastic recipe for remoulade:

New Orleans Remoulade
  • 1 pint mayonnaise
  • 2 tablespoons Creole mustard
  • 2  tablespoons grated onion
  • 3 tablespoons prepared horseradish
  • 1/4 teaspoon salt
  • 1 tablespoon lemon juice
  • 1 tablespoon white wine Worcestershire sauce
  • 1/4 teaspoon pepper
  • 1/4 teaspoon cayenne
  • 1/4 teaspoon hot sauce

Combine all ingredients and mix well. It is better chilled for at least a couple of hours, but I can never wait that long to use it! Makes 2 1/4 cups sauce.


Thursday, January 28, 2016

Mint Chutney

Unless you eat Indian food, I bet you have never had mint chutney. I hadn't until we went to the wonderful India Palace in Cookeville, where it was one of the sauces/condiments available on the buffet. Wow! It is sooooo good. It goes incredibly well with not only Indian dishes, but with other dishes and meats like lamb or pork. To be honest, I'd eat this on almost anything!

Mint Chutney

Look at that green goodness. I'm drooling on my keyboard here. In fact, I need to go make some after I post this! This delectable condiment is super easy to make. No, seriously, it is VERY easy. Do you have a blender, food processor, or mini-chopper? Then you can make this in a snap.  And the smell... oh the smell as you are making it. You could float away on the fresh and amazing scent.

You owe it to yourself to give this a try, even if you are not making Indian cuisine to go with it.

Mint Chutney

  • 1/2 cup fresh cilantro leaves
  • 1/2 cup fresh mint leaves
  • 1/4 cup chopped red onion
  • 2 tablespoons  lemon juice
  • 1 tablespoon water
  • 1/4 teaspoon  salt
  • 1/8 teaspoon sugar
  • 1 serrano or jalapeno chile, coarsely chopped
  • 1 (1/2-inch) piece peeled fresh ginger
 Combine all of the ingredients in a blender, food processor, whatever you have to grind up food, and blend until smooth. That is it! You now have some awesome mint chutney to eat with everything.


Tuesday, January 26, 2016

Coconut Sundae

I love coconut. I used to hate coconut. These two things are true. When I was a kid, coconut was the grossest thing imaginable to me! I refused anything with it. I think it took me to my mid-twenties before I realized how foolish I had been and began to adore this wonderful food.


Today, I got to thinking...what IS a coconut? Is it a fruit or a true nut (like me)?  According to the Library of Congress researchers, "Botanically speaking, a coconut is a fibrous one-seeded drupe, also known as a dry drupe. However, when using loose definitions, the coconut can be all three: a fruit, a nut, and a seed." Who knew?  If you want to read the whole article, which tells you everything you could possibly want to know about coconuts, here is the link. It is a good one.

I only bring up the lovely coconut because last night I made a Coconut Sundae that was fantastic! It was so good that my hubby, who hates desserts unless they are banana splits, raved about it. That never happens!

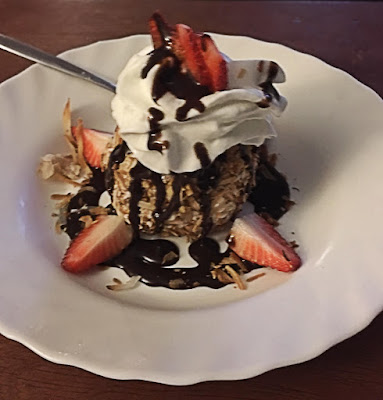
To backtrack, I really liked the sundae that the Outback used to have, Sydney's Sinful Sundae. Remember that one? It was a ball of  ice cream coated with crunchy coconut with chocolate and whipped cream. Sadly, it isn't listed on their menu anymore...maybe you can still ask for it? If you can, you should! But, anyway, I decided last night that I had to have one. HAD to have it. I had some fresh coconut in the fridge, ice cream and toppings.. let's do this! In the end, it tasted exactly like it. Perfect, crunchy and delicious. Mission accomplished.


The photo leaves a bit to be desired, I was in too big of a hurry to eat it to do the picture taking justice. But you can see, it is divine. The best part, it is so easy that anyone can make it. 

Crunchy Coconut Sundae
Makes 2 sundaes
  • 2 big balls of vanilla ice cream
  • 1 cup of toasted coconut
  • Chocolate syrup
  • 3 strawberries
  • Whipped cream
  1. Preheat your over to around 275 - 300 degrees. 
  2. Take your shredded coconut, fresh or bagged, sweet or not, and spread it on a baking pan. Put it in for 10 minutes then check every 5 minutes to make sure it doesn't burn. You will need to stir it around to make sure it toasts evenly. This is super easy to do, so don't be nervous. You will want to put it on everything after this!
  3. After the coconut is toasted, let it cool completely, then put it in a bowl that will allow you to roll a ball of ice cream in it. 
  4. Get two pretty plates (or ugly ones, this part doesn't matter) and drizzle a circle of chocolate syrup around the edge.
  5. Quarter two of the strawberries and place evenly around the plates, 4 pieces in each, as in the picture.
  6. Scoop out an amount of ice cream about as big as your fist. Use your hands to shape it roughly into a ball. Roll this in the coconut until it is covered, really thickly covered, then put it in the middle of the chocolate syrup circle.
  7. Drizzle the ice cream heavily with chocolate syrup.
  8. Put a healthy amount of whipped cream on top.
  9. Thinly slice the last strawberry and divide it between the sundaes, on top of the whip cream.
  10. Drizzle just a little chocolate syrup over the top and sprinkle with some of the left over coconut.
  11. Enjoy!


Thursday, December 24, 2015

Bean Dip

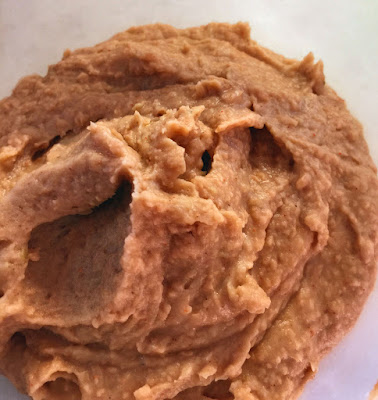
Time for a little Christmas Magic! My brother and I used to love that bean dip that came in the little cans. We pigged out on it all the time with Doritos. I wanted to make some for Christmas this year and began looking around for the recipe. Turns out, I didn't have to look farther than my favorite cookbook author, Todd Wilbur! His version is spot on and takes me straight back to my childhood. Also, it is sooooo easy!  I doubled the recipe for a crowd and I did teak the number of jalapeno slices...cause mine were tiny!

Easy Bean Dip 
Look at those spices! Yummmmmm!


Ingredients

1 (15 ounce) cans pinto beans, drained
4 canned jalapeno slices, plus 1 tablespoon jalapeno juice  (I doubled the recipe and used about 1/4 cup of the slices)
1/2 teaspoon salt  
1/2 teaspoon sugar  
1/4 teaspoon onion powder  
1/4 teaspoon paprika  
1/8 teaspoon garlic powder  
1/8 teaspoon cayenne pepper

Directions

  1. Combine all ingredients in a food processor.
  2. Puree on high speed until smooth.
  3. Cover and chill for at least 1 hour before serving.
That's it! Now you have the tastiest bean dip around. I have also tried this with great northern beans...omg it is absolutely amazing! So if you want a white bean dip, you can use those. I believe you could use any type of bean and it would turn out great. Chick Peas with this make a great hummus!
If you like this, head over to Todd's site and find a whole slew of wonderful copycat recipes to try! He also sells his books and some great spice mixes and such. 

Friday, December 4, 2015

Curried Rice

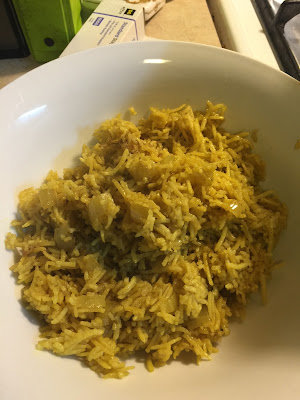
I have fallen in love, a deep true love that I know will last a lifetime....with Basmati rice. I have had it in Indian restaurants and adored it, but when I tried at home, fizzzzzle.  Well, let me tell you that has changed. The key to success with Basmati is all in the cooking process.  I had a rice cooker, yes, shameful. I thought it was the bee's knees. No, it has kept me chained to bland, non-fluffy rice!  I am going to show you how to make delicious, fluffy, Basmati rice and this technique works on jasmine and regular too. This is how you get the great, separate grains!  Oh and I will give you the best curried rice recipe ever while I'm at it!

Curried Rice
Look at this delicious stuff.


Whatever recipe you have that calls for rice, here is how you need to prep your rice:

1. Cover rice with water and wash it. Yes. Wash it! Swish it around good with your hand and then drain the water off, refill it and do it again...total of 4 or 5 times. You can just drain most out, no need to go get the colander.
2. When your water is looking mostly clear after washing, fill it to cover well and let it soak for at least 30 minutes.
3. Finally, drain it well and use as usual for your recipe.

Now for the curried rice. I dream about this rice. In fact, I am cooking some this very moment. It is that good.

Ingredients

        1 medium onion, finely chopped
        3 garlic cloves, finely chopped
        3 tablespoons olive oil
        4 teaspoons curry powder
        2 cups long-grain white rice
        3 1/4 cups water
        2 teaspoons salt

1.  Cook onion and garlic in oil in a 3- to 4-quart heavy saucepan over moderately low heat, stirring, until softened. Add curry powder and rice and cook, stirring, 1 minute.
2. Add water and salt and bring to a boil, then boil, uncovered, without stirring, until surface of rice is covered with steam holes and grains on top appear dry, about 8 minutes.
3. Reduce heat to as low as possible, then cover pan with a tight-fitting lid and cook 15 minutes more.
4. Remove pan from heat and let rice stand, covered, 5 minutes, then fluff with a fork.

That is it. You will roll around on the floor from the goodness.


Sunday, November 15, 2015

Best Salsa, period.

My Salsa is now up for sale! I have had so many people tell me to start doing it, I finally have. Head on over to the shop section for all the yummy details!

Always Made Fresh